HOW TO TAKE STUNNING JEWELLERY PHOTOGRAPHS AT HOME
- Auguste
- Jun 1, 2020
- 2 min read
Starting a jewellery business can be tough on your budget. I completely understand that not every startup business can afford professional jewellery photography. However, it makes me extremely sad seeing small businesses post images of their products on Instagram just for the sake of posting, without having carefully crafted each photograph with love and attention to detail.
Creating a successful brand without quality visual content is virtually impossible. Eye catching, consistent, and engaging photography = more sales. It's a vicious circle. You must INVEST in photography to make your jewellery business thrive.

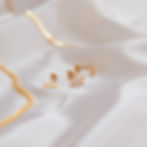
The photo above was taken this weekend with no professional lighting, just a few props, glorious morning sunlight, and a few DIY photography tricks. How did I do it? Let me share 3 tricks to make sure your home jewellery photography kicks ass.
1 - Find the right light
Do you have a place in the room with amazing light in the morning? Or maybe a spot where the evening golden light looks like nothing else in the world? Use it! Play with the bright spaces you have around your house. If you find that the light is very harsh or dropping heavy shadows you would much rather not have, pop to the art shop and buy a white foam board - it will become a perfect light filler for your DIY photoshoot! I personally use it all the time. Firstly, it gets rid of unwanted reflections on shiny jewellery materials, and secondly, it softens the harsh shadows. Just put it opposite your main light source and... voila!

2 - Get creative with props
My house is covered in different colours, sizes, and textures of bathroom tiles. Why? They make great surfaces for jewellery photography! I have tonnes of marble boxes, mirrors, vases, and satin cloths that do a great job as props. Gather all photogenic knick knacks from around the house and get creative! Go on a shopping spree on Zara home, H&M home, or you local independent shops. You'll be surprised how much value props add to product photographs.

3 - Worry about filters no more
There are so many, and I'm telling you, SO MANY online tutorials on how to make custom filters on Lightroom. Find a colour palette that works perfectly with your brand aesthetic and play around with it. Create a couple of Lightroom filters that you can apply to your future photographs with one click of a mouse, making your photos look stunning.

Here you go, these are my 3 tips on making your DIY jewellery photography look fire! Remember, creating stunning jewellery photographs takes time. For me personally, it took YEARS (and my precious Canon 5D mark 4 with a prime 100mm lens) to shoot the way I shoot now!
Anyway, are you at an advanced stage of your business and you are ready to invest in professional jewellery photography? Let's get chatting - drop me an email to: hello@chocianaite.com
Augustė xx


